Cómo llevar una bicicleta en tren en Japón
Una pregunta habitual para los ciclistas que vienen a Japón es: ¿se pueden llevar bicicletas en el tren? La respuesta es sí.
Este post y el vídeo de apoyo "Cómo llevar una bicicleta en los trenes de Japón" son nuestras prácticas guías sobre cómo llevar la bicicleta en el tren en Japón.
Índice
- Introducción >
- Shinkansen (tren bala) >
- El coche verde >
- La bolsa del tren >
- Cómo utilizar la bolsa de tren >
- Punteros adicionales >
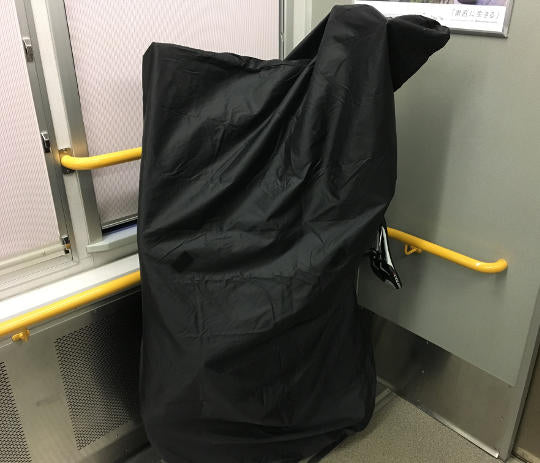
Llevar bicicletas en el tren en Japón no es tan sencillo como para nuestros amigos de Europa o Norteamérica. Para llevar una bicicleta en el tren hay que cubrirla por completo, por lo que en esencia no es más que una bolsa grande o una pieza de equipaje. En la mayoría de los trenes hay compartimentos superiores y, si llevas alforjas, una mochila o cualquier otra bolsa, puedes liberar tus manos colocándolas encima e intentando encontrar un buen sitio para tu bicicleta.
Puede alquilar una bolsa para bicicletas en nuestro Kioto y Osaka lugares
Shinkansen (tren bala)
También es posible llevar la bicicleta en la maleta en el Shinkansen, pero ha habido algunos cambios recientes en la política de JR en relación con el equipaje de gran tamaño y es una buena idea para comprobar el Página de reservas de JR Oversized Luggage para obtener la información más reciente.
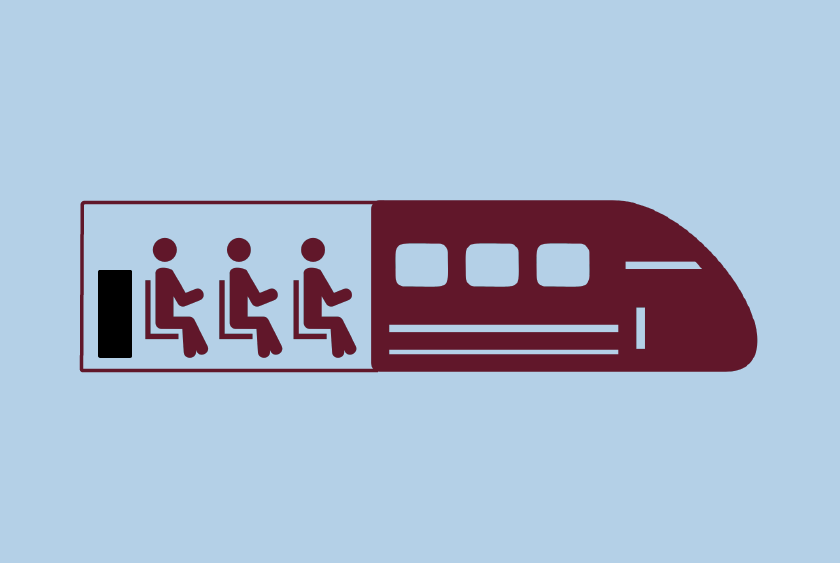
Por nuestra propia experiencia en el tren bala, siempre hemos utilizado el espacio que hay detrás de la última fila en todos los vagones. Sin embargo, este espacio debe reservarse con antelación, por lo que te recomendamos que lo planifiques con antelación para asegurarte de que tienes sitio para guardar la bicicleta.
Un truco es intentar subir al Shinkansen que sale de su destino. De este modo, la gente de su estación será la primera en embarcar y habrá más posibilidades de reservar un asiento trasero y conseguir espacio para guardar cosas. En japonés esto se llama "destino inicial + hatsu", así que si va a Hakata desde Osaka, pregunte al personal cuándo es el próximo "Shin-Osaka hatsu".
El coche verde
El vagón verde es el vagón de clase superior del Shinkansen. Son más caros, pero cada asiento tiene un poco más de espacio y hay más posibilidades de reservar un asiento, ya que son más caros y no siempre están reservados.
Los asientos delanteros y los traseros tienen espacio extra para guardar cosas en el vagón verde, así que si tiene una complexión más grande y le preocupa encontrar espacio en el Shinkansen, puede preguntar si hay asientos delanteros o traseros disponibles en el vagón verde.
La bolsa del tren
Una bolsa de tren es imprescindible para transportar la bicicleta en Japón.
Existen varios tipos de bolsas de tren o "bolsas Rinko". La favorita de RBRJ es la bolsa Tioga Cocoon, que hemos estado utilizando de forma fiable.
La bolsa se enrolla en un pequeño bolsillo del tamaño de una botella de agua, por lo que es muy compacta cuando no se utiliza.
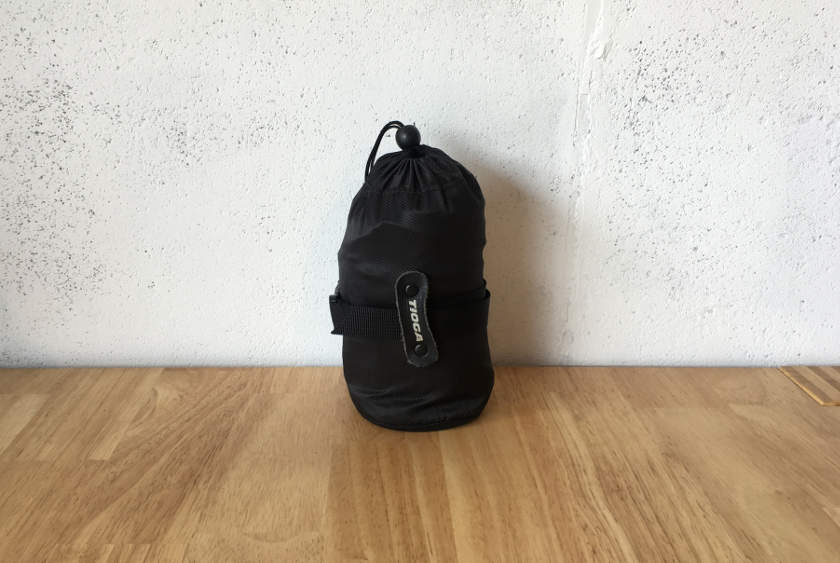
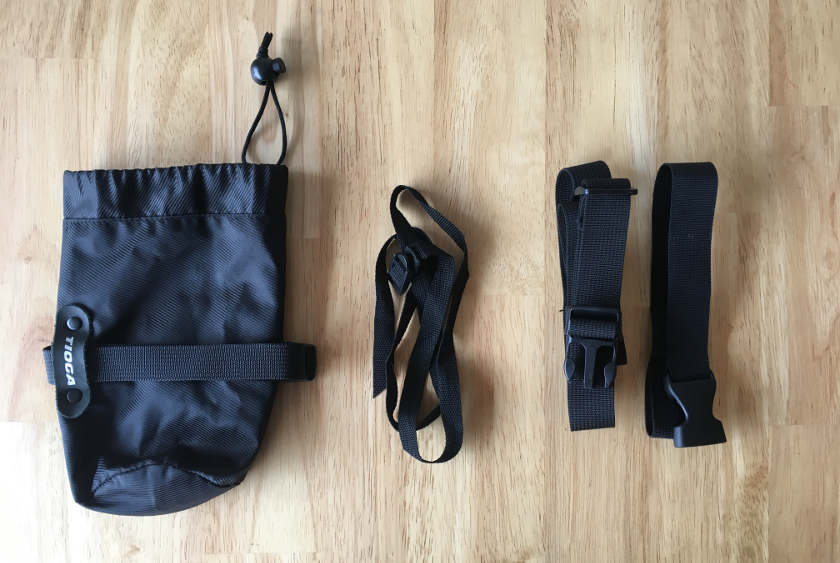
Dentro de la pequeña bolsa de transporte que tiene:
- Bolsa para bicicleta (ver imagen más abajo en el blog)
- Correas pequeñas (en el centro de la imagen inferior)
- Correas de transporte más grandes (dos correas - a la derecha en la imagen inferior)
Instrucciones para colocar la bicicleta una bolsa de tren
Tiempo necesario: 10 minutos
Sólo te llevará unos minutos meter tu bicicleta en una bolsa rinko. Sigue los pasos que se indican a continuación.
- Quitar la rueda delantera y fijarla al chasis
En primer lugar, desmonte la rueda delantera y coloque el pedal y la biela mirando hacia atrás y paralelos a la vaina.
Luego, con tres de las correas más pequeñas (hay más en la bolsa, pero con tres es suficiente), fija la rueda delantera alrededor del cuadro, la biela y la zona del tirante de la cadena. Debes fijar la rueda al lado izquierdo de la bicicleta (el lado sin transmisión) y ya puedes atar las correas formando arcos.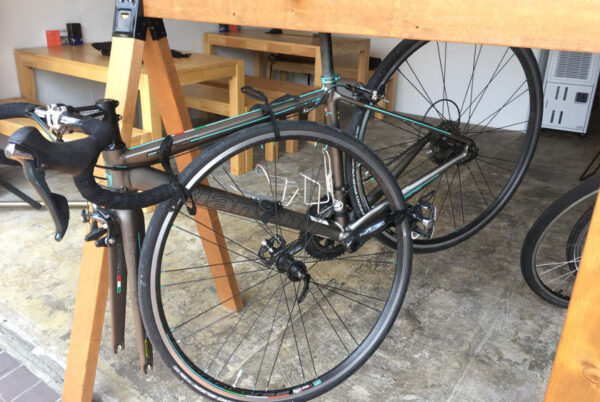
- Preparar la bolsa
En primer lugar, asegúrate de saber cuál es la parte delantera, trasera, superior e inferior de la bolsa. La parte trasera de la bolsa es redonda, ya que es donde se asienta la rueda trasera.
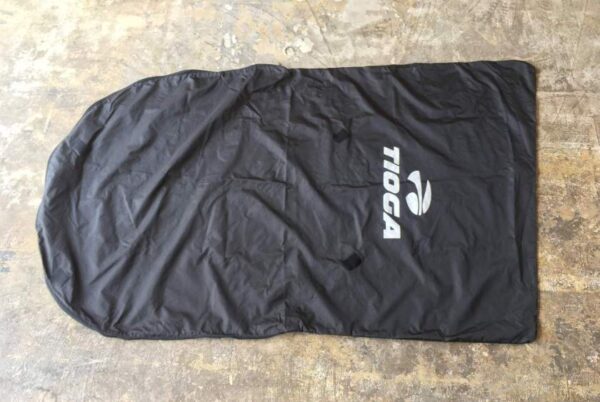
La parte superior de la bolsa tiene un pequeño agujero para poner una correa alrededor de la tija para el manillar. La tija del sillín sobresaldrá entre las dos cremalleras (más información sobre cómo subir la cremallera más abajo).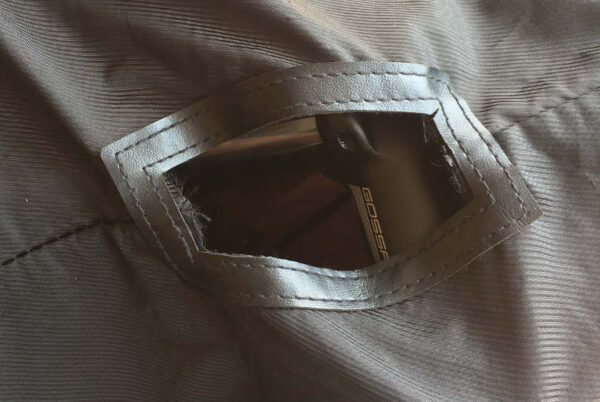
La bolsa se abre y se cierra con dos cremalleras en la parte trasera de la bolsa. Una vez abiertas las cremalleras es hora de meter la moto en la bolsa.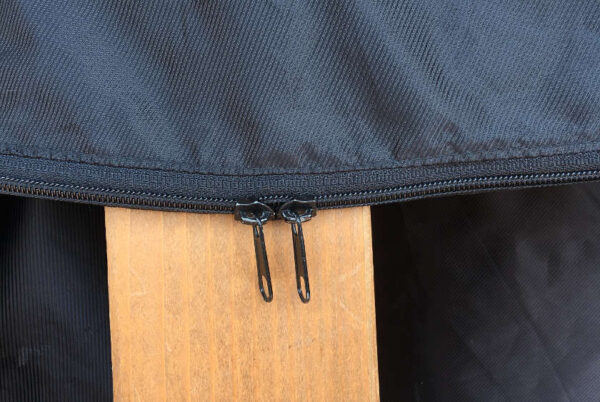
- Mete la bici en la bolsa
Empieza a meter la bicicleta en la bolsa, primero el manillar. El manillar se girará hacia un lado a medida que metas más parte de la bicicleta en la bolsa, pero puede que tengas que darles un poco de vueltas.
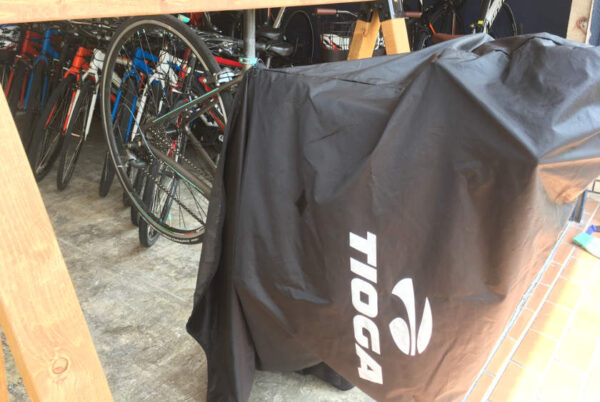
A medida que vayas maniobrando la bolsa sobre y alrededor de la moto, puede haber momentos en los que sea más fácil apoyar la moto sobre la rueda trasera para que la bolsa se mueva y cubra la moto libremente por ambos lados.
Cuando la bicicleta esté bien colocada en la bolsa, podrá cerrar la cremallera inferior alrededor del plato y la rueda trasera.
Cuando hayas terminado, tendrás las dos cremalleras bien ajustadas a ambos lados de la tija del sillín.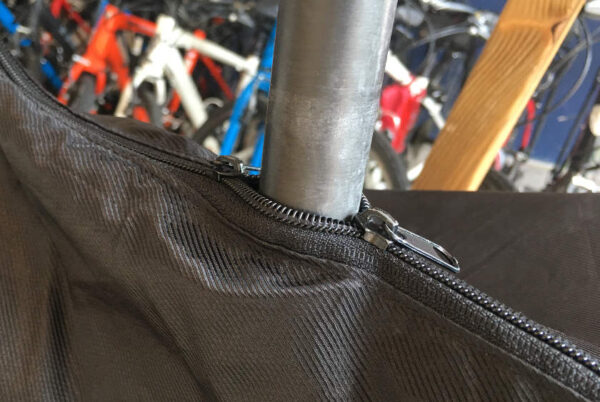
- Uso de la correa para el hombro
Si lo desea, puede fijar las correas de hombro para tener la opción de llevar la bicicleta al hombro. Esto resulta útil cuando tienes las manos ocupadas con alforjas u otras bolsas y necesitas llevar la bicicleta al hombro.
Si no llevas bolsas o llevas mochila, la bandolera no es necesaria. Yo suelo llevar la bici por el sillín con una mano y con la otra introduzco el billete en las taquillas.
Así se pone la bandolera...
Utilice la correa más larga en la tija del sillín y la más corta en la potencia del manillar.
Primero, enrolla el más largo alrededor de la tija del sillín y luego pasa el extremo del clip por el bucle del otro extremo. A continuación, tira de él para apretarlo.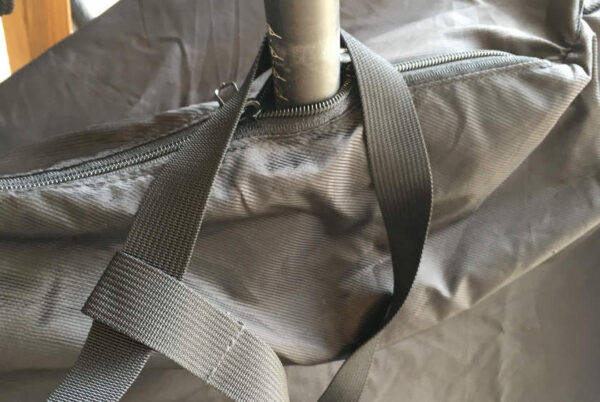
A continuación, enrolla el pequeño alrededor del tallo y pasa el extremo del clip por el bucle del otro extremo. Tira con fuerza.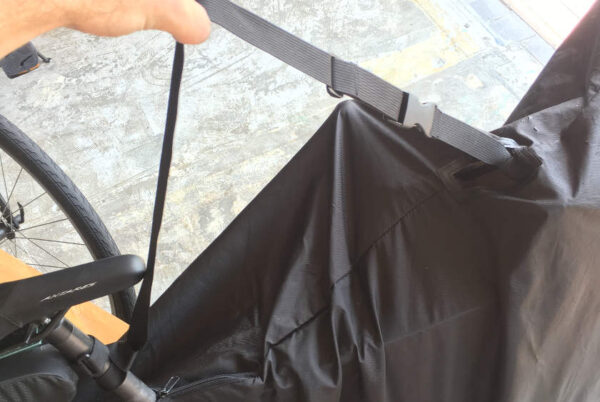
Sujeta los clips y ya tienes tu bandolera. - Nota sobre la tija y el sillín
Según algunas normas, JR indica a veces en los documentos que el sillín y la tija también deben estar cubiertos y no sobresalir.
Sin embargo, por nuestra experiencia en el tren, nunca nos han pedido que cubramos el asiento al utilizar las maletas del tren.
Si por casualidad el personal te pide que cubras el asiento, basta con que cierres las dos cremalleras situadas encima del asiento para que quede todo cubierto. Dependiendo del tamaño de tu chasis y de la altura del asiento, puede que necesites bajarlo un poco, así que asegúrate de tener a mano tu multiherramienta por si acaso.
Eso es todo, ahora debería estar listo para coger el tren con su bicicleta.
Punteros extra
No te embolses en las narices del personal de la estación
Recomendamos embolsar la bicicleta un poco fuera de la vista del personal de la estación, que suele estar sentado en la cabina cercana a las puertas de venta de billetes.
Aunque está permitido llevar bicicletas en los trenes cuando están cubiertos, es mejor no llamar demasiado la atención ni ser una molestia.
Las estaciones japonesas pueden estar muy concurridas y el objetivo último del personal de estación es asegurarse de que los trenes circulen a su hora con el mínimo alboroto. Por eso, si te colocas en medio de la estación o, peor aún, frente a las puertas de venta de billetes, puedes estorbar a la gente e invitar a que el personal se preocupe o te haga preguntas.
En mi opinión, hacer la maleta y prepararse un poco lejos de las taquillas y comprar el billete con antelación facilita mucho el proceso. Cuando estés listo, camina hasta las puertas, pasa y dirígete al andén.
Evite las horas punta
Si puedes ser flexible con el tiempo, evita las horas punta y disfruta de un poco más de espacio para dejar la bici. Si tienes que coger el tren a una hora punta, organízate e intenta subir en los extremos de los vagones, ya que hay algo más de espacio para la bici y otras bolsas.
Reflexiones finales
Una bolsa rinko puede ser realmente la llave que abra la puerta a muchas grandes aventuras ciclistas en lugares remotos de Japón.
Hay momentos en los que el tren está lleno, o tienes que dar un largo paseo con la bici y las maletas por la estación hasta los distintos andenes, pero aguanta y piensa en cómo te sentirás cuando vuelvas a la bici con el viento en el pelo.
